Using Cpanel FileManager to access files within your hosting account
Your SherwoodHosting account includes a free Control Panel called Cpanel. One of the built-in features is its file manager from which you can view directories and files within your account, upload/download files, and even edit files. See Cpanel for how to login using your account (ftp) username and password. See web page editing for how to use the file manager to edit your files.
Finding the File Manager from your Cpanel
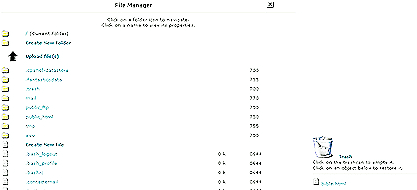
Cpanel has a plethora of utilities to manage your hosting account. Log in to your Cpanel and your home panel will be displayed. This is the control center where you can access everything else. Files for your site can be accessed from the file manager. Clicking on the file manager icon will open a new window, so if you have popup blocker, you should disable it now, for the time being. After the window has opened, you will see a screen with several folders and files in it, like this:

You have now navigated to the file manager.
Which directories to put files in and how to create them:
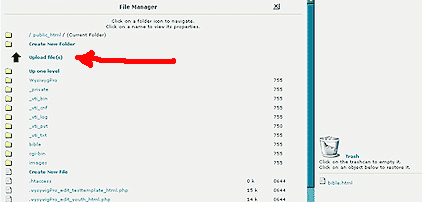
All files go into either the public_html directory or the www directory (these are the same). These folders contain the files for your site. Notice the other files and folders around in the picture. You don’t really want to mess with these folders and files, because they contain the files that make your site run. Navigate to it now by clicking on the GOLD FOLDER icons. You will now see a screen that has folders in it, like this:

How to create folders:
A folder (directory) is a container for files (web pages). You can create a new directory with the "create new folder" command (above the red arrow above).
How to upload files:
Navigate using the GOLD FOLDER icons to the directory you want to upload to. Then click on "Upload file(s)" (see red arrow above). Use the browse dialog box that pops up to find the file you want to upload. Click Upload.